Since the early versions of AIO Boot, this tool has supported booting from the LAN. It supports you to do a lot of work such as installing OS, running tools to Ghost, managing partitions, backup and recovery.
You just need a computer to replace the other bootable devices like USB, HDD and DVD… Of course, clients need to have a local area network connection with the server and have network boot support. If you boot from USB, boot loader and operating systems will use the files on USB. If you boot from the LAN, the boot loader and operating systems will download the necessary files from the LAN. The advantage of network booting is that you will not need to attach boot devices to clients (except cables). If the data transfer rate in your LAN is slower than the read/write speed of boot devices such as USB, HDD or DVD, the speed is the downside of this method.
AIO Boot supports Windows installation from network boot. You can install Windows by integrating ISO and using the Windows Installer or booting into WinPE and installing Windows manually. Most Linux distributions like Ubuntu, Debian, Linux Mint, Arch Linux are also supported.
Configure PXE server
To boot from LAN, you need to have a PXE server, a DHCP server, and a server to share files. You just need a computer to do all this.
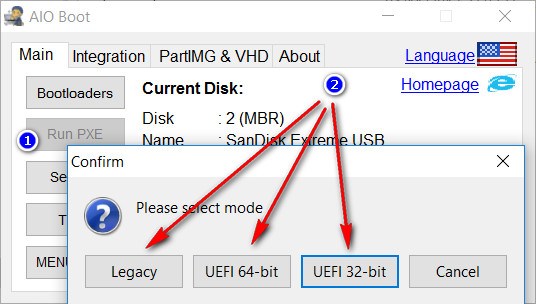
AIO Boot uses Tiny PXE Server to create PXE server and DHCP server. Run AIOCreator.exe, select Run PXE and select mode to run Tiny PXE Server.
AIO Boot uses iPXE as boot loader, which supports both legacy BIOS and UEFI (32-bit and 64-bit) modes.
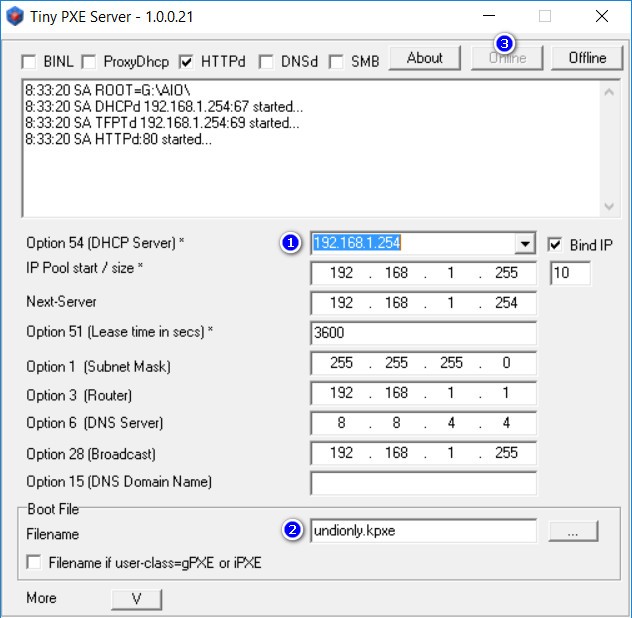
Tiny PXE Server will run and be preconfigured.
If the configuration is not correct, reconfigure it.
Option 54 (DHCP Server): The IP address of the computer running Tiny PXE Server. This list contains the IP addresses of network adapters (including VirtualBox and VMware). You need to select the correct IP address in the same local area network of the clients.
Filename: Boot file of iPXE, you can choose another boot file in the /AIO folder if the current file does not work on the client.
Legacy: undionly.kpxe, undionly.kkpxe, ipxe.pxe and intel.pxe.
UEFI 64-bit: ipxe64.efi, snponly64.efi and intel64.efi.
UEFI 32-bit: ipxe32.efi, snponly32.efi and intel32.efi.
After reconfiguring, click the Offline and Online buttons for the changes to take effect.
For Linux distributions like Ubuntu, Debian, I use FreeNFS to create NFS servers. You do not need any further configuration.
Share Folder or Drive
If the files you need are already on the client, just use it. But if the files are not on the client computer, of course you need to get it from another computer. You can download it from the Internet but the speed will be much slower than the local area network.
First, copy all the necessary files to a folder and then share it. Or share a drive. See the Guide to Share a Folder or Drive from Microsoft.
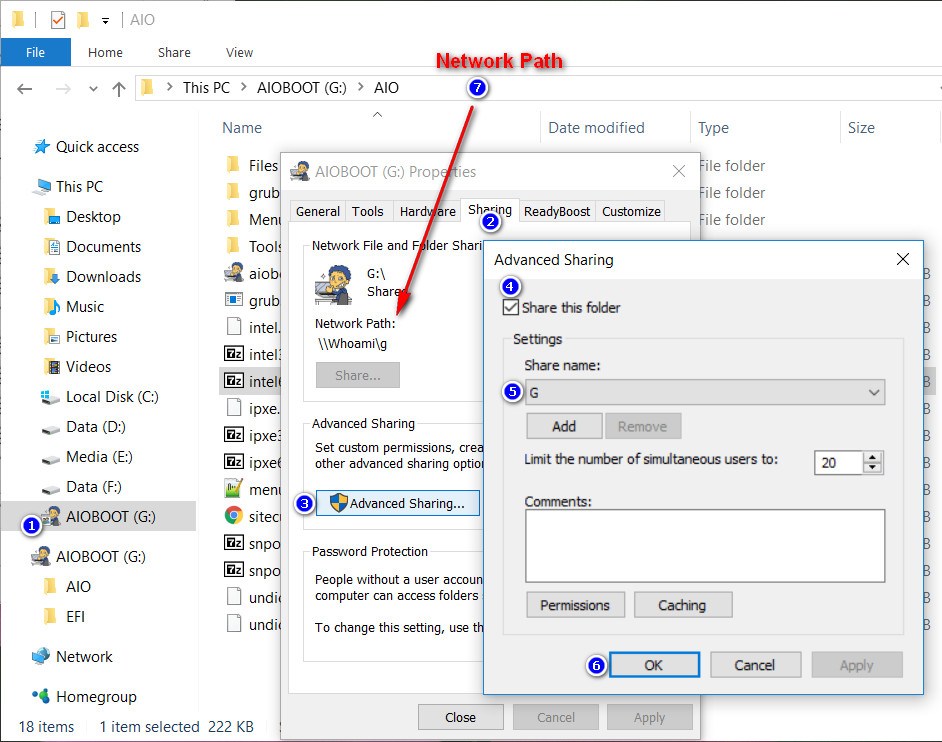
Here are the steps I share the AIO Boot drive:
Right-click on the AIO Boot drive and select Properties.
Switch to the Sharing tab.
Select Advanced Sharing…
Check the Share this folder box.
Enter a name for the Share name.
Click OK.
The Network Path is what I need to get, here is \\Whoami\g.
Install Windows
Since AIO Boot v0.9.7.5, you can install Windows from network boot using the Windows Installer. Here are step by step:
Run AIOCreator.exe and integrate Windows ISO file into AIO Boot. Only support Windows 7, 8, 8.1, Windows 10, does not support Windows XP.
Share AIO Boot Drive.
Run PXE and boot into PXE on clients.
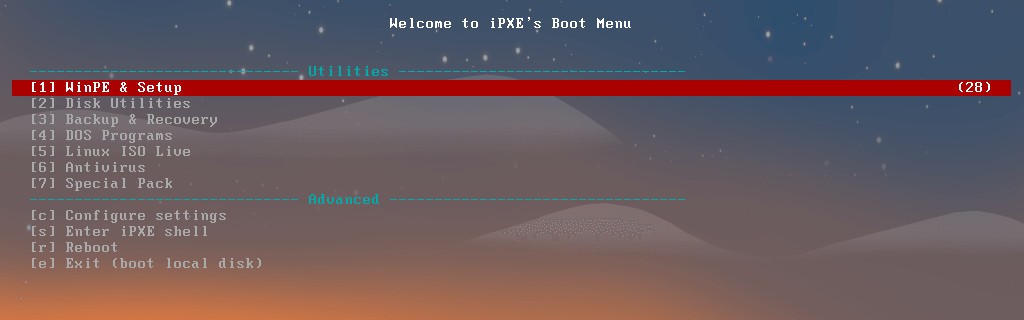
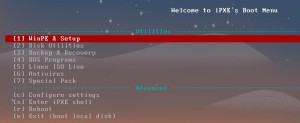
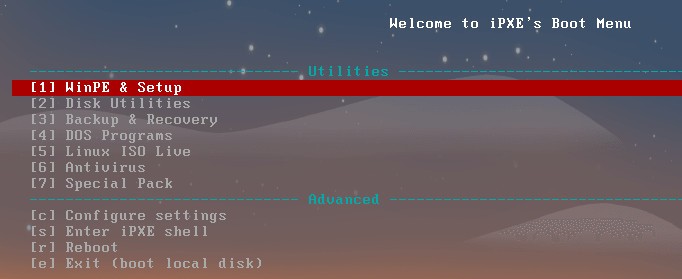
This is the iPXE menu of AIO Boot. Access the WinPE & Setup menu and boot into the Windows menu that you integrated in step 1.
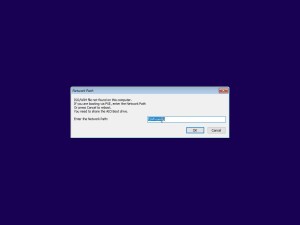
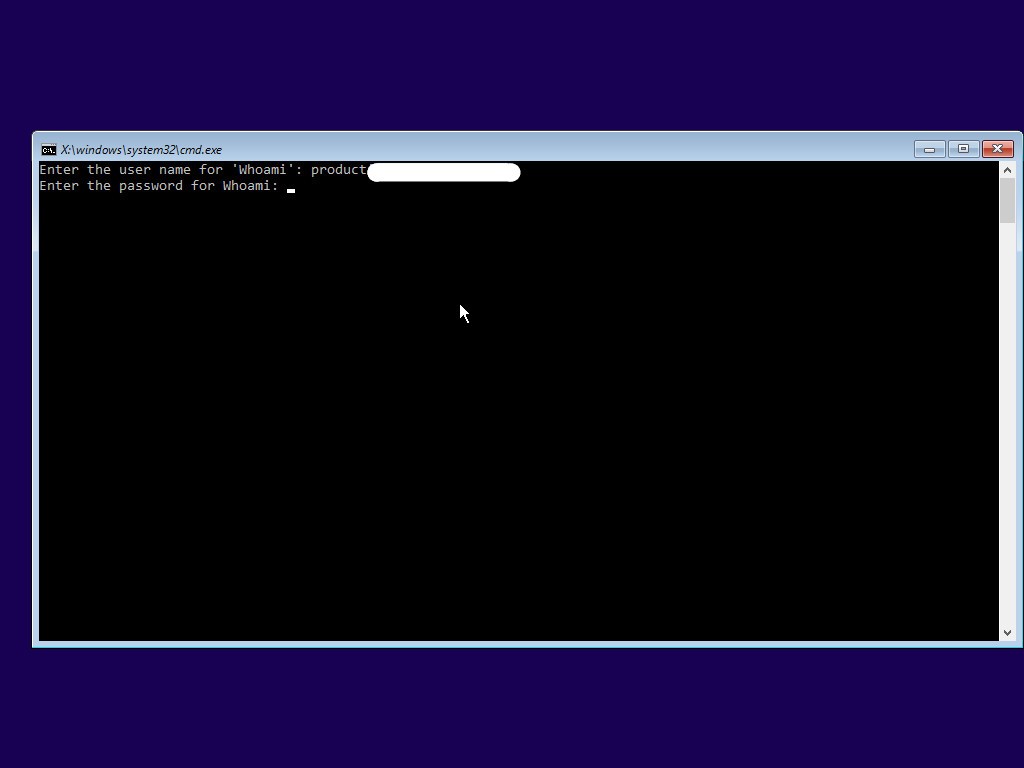
Enter the Network Path you shared in step 2 when asked. You can enter Network Path|Username|Password if the server has Username and Password. For Windows 8, 8.1, and Windows 10, if you use a Microsoft account to sign in, it is also your computer’s username and password.
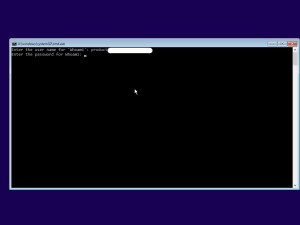
Enter the username and password that you used to share the AIO Boot drive. Or you can Turn off password protected sharing. The password is not displayed when you type it at the password prompt.
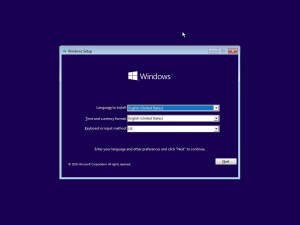
If the information is correct, the Windows Installer will appear. You can then install Windows from Network boot using the same steps as using a USB or DVD.
If the program reports that the Network Path is incorrect, it may be due to several other reasons:
Windows 7 may not support your network drivers. Try Windows 10 or Windows 8.1.
Connection blocked by Firewall, try disabling it. My connection is blocked by Bitdefender, I disabled the firewall in Bitdefender and everything works.
If you only use a single computer to initialize the PXE server, you only need to enter the Network Path once. AIO Boot v0.9.8.7 supports reading Network Path from /AIO/networkpath.txt. Just add the Network Path to this file, you can add multiple Network Paths by adding multiple lines. The tool will try one by one.
\\yourcomputername\sharename
If your computer has an account and password, add them behind the Network Path separated by a vertical bar (“|”).
If you then initialize the PXE server on another computer, this means that the Network Path, user name, and password have changed. Just enter the new information in /AIO/networkpath.txt.
The above steps will help you to install Windows easily. There is another method that you can use for many other purposes. That’s using WinPE. See instructions for installing Windows from WinPE for more details.
Download WinPE and integrate it into the AIO Boot as instructed in the Readme.txt file.
Boot into WinPE from network boot.
Use the net use command to connect to the drive or folder you have shared. Here I will attach the Network Path to the Z: drive.
net use Z: \\Whoami\g
Now you can mount Windows ISO files or use the dism command to install Windows. From WinPE, you can run diskpart command to partition before installation. Or run the tools from the folder you have shared, or Ghost…


Darknet legit financial vendors and scam marketplace reviews,
ReplyDeleteFULLZ, CC can be bought from Deepweb - Darknet Financial Vendors.